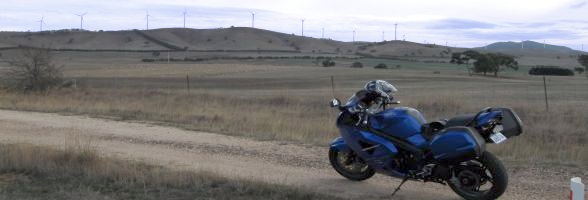
Triumph Sprint info

Here you will find some info for Triumph Sprint owners... tuning info, workshop and owners manuals etc. This applies particularly to the 2005 model I have, but may be suitable for other models.
Tuning
You don't need a "power commander" or similar for your Triumph! All the capability is built in, you just need an inexpensive cable and some awesome free software to load alternative tuning maps into the ECU. You can even tweak the maps yourself if you know what you're doing. Of course you will also need a laptop computer. (Could use your desktop but sometimes getting your bike into the house can be difficult!)
Cable: You will need to buy a cable that connects to a USB port on your laptop, and plugs into the bike's OBD (On Board Diagnostic) connector located in the right hand fairing compartment. There are many available on Ebay for under $10 posted from Hong Kong or China. If you're in a hurry it can be bought locally but will cost a bit more. Search for OBD VAG USB. They are often advertised as suitable for VW/Audi/Skoda vehicles and most seem to be blue. You won't need the software CD that usually comes with them.

Software: TuneECU is completely free and supports many Triumph bikes. Load tuning maps, perform diagnostics and service operations, real-time monitoring. Read the site. Explore the links. Don't be too concerned by all the warnings. I have done this many times with no problems. Of course it is possible to damage your ECU or engine if you load the wrong map or cancel it half way through, just be sensible and follow the instructions.

Tuning maps: here (also free). You need to carefully select according to your model and VIN range. I recommend you start with the TORS (Triumph Off Road System) tunes. These are genuine OEM from Triumph and completely safe to try, recommended with an aftermarket or "de-baffled" exhaust. Many models also have listed user supplied/modified tunes, designed for higher performance, track days or whatever.
Exhaust
Sure, you can spend over a grand on an exhaust system to make it sound nicer and maybe get a bit more power. Alternatively, you can partially "de-baffle" the standard muffler with just a couple of hours work. This is exactly what I did, it greatly improves the exhaust note without being excessively loud. Also it is virtually invisble that you've done this and it "looks standard".
You will need:
- Small angle grinder with cutting disk
- Electric drill
- Long drill bit (300mm long, diameter between 5-20mm (I used 1/4", 6.5mm)
- Normal tools to remove/install the muffler
I found these pictures somewhere on the net, showing the muffler internals. You do NOT need to cut open your muffler though! The pictures are just so I can show the change and describe how to do it clearly.

-
Remove the muffler. This is relatively simple, only a few bolts and one clamp. Remove the "decorative" tailpipes from the muffler.

-
Carefully cut the welds around the outer two tailpipes with an angle grinder or similar tool. The aim is to remove the pipes completely and leave relatively neat and close to circular holes. The centre pipe is untouched. You can attempt to grind the welds away and remove the pipes in one piece, or just cut right through the pipes. If you do this the other half will fall inside the muffler but is easily removed by tipping it up and grabbing with pliers. The pipes will not be replaced, just left as holes. This seems to make no difference and the exhaust gas still flows through through the decorative tailpipes. (If you have stainless steel welding facilities you could weld the stubs back later, but the prices I was quoted to do this were ridiculous)

-
Use your long drill bit through each hole to drill a series if holes in the baffle. The area covered by the holes should be similar to the area of the two large internal tubes. For example, a grid of 16 holes, depending on the drill bit size. Be careful not to pierce the outer casing.

- Tip up and shake the muffler to remove as much of the drill swarf as possible.
- Replace the muffler. All done :-)
Workshop Manual
01. Contents and General Information.pdf (1.4 MB)
02. Scheduled Maintenance.pdf (110 kB)
03. Cylinder Head.pdf (849 kB)
04. Clutch.pdf (275 kB)
05. Crankshaft and Pistons.pdf (694 kB)
06. Balancer.pdf (143 kB)
07. Transmission.pdf (742 kB)
08. Lubrication.pdf (618 kB)
09. Engine Removal.pdf (300 kB)
10. Fuel System and Engine Management.pdf (3.3 MB)
11. Cooling.pdf (446 kB)
12. Rear Suspension.pdf (986 kB)
13. Front Suspension.pdf (607 kB)
14. Brakes.pdf (2.9 MB)
15. Wheels and Tyres.pdf (861 kB)
16. Frame and Bodywork.pdf (356 kB)
17. Electrical.pdf (715 kB)
17. Wiring Diagram annotated.pdf (1.1 MB)
17. Wiring Diagram.pdf (1.7 MB)
Other files
Alarm connector.doc (20kB)
maintenance checksheet.pdf (43 kB)
maintenance schedule.pdf (22 kB)
Scottoiler installation ST 1050.pdf (142 kB)